
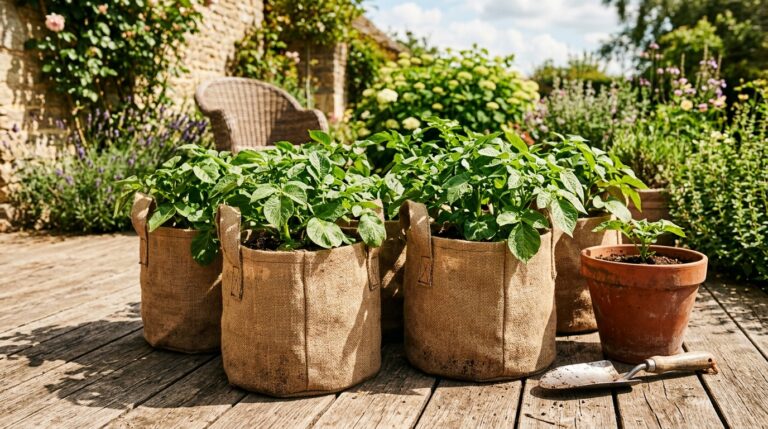
Why Grow Potatoes in Bags?
Growing potatoes in bags is one of the most rewarding things you can do as a home gardener, and the best part is that you don’t need a large plot or even a traditional garden bed to do it. Whether you’re working with a patio, a balcony, or a modest back yard, a few grow bags and some good compost are really all you need to produce a decent harvest of fresh, home-grown spuds.
There’s also something wonderfully satisfying about tipping a bag over at the end of the season and discovering a pile of potatoes you grew yourself. It’s a great project for beginners and a brilliant one to do with children too.
What You’ll Need to Get Started
Before you plant anything, it’s worth gathering your supplies. Here’s a straightforward list of what you’ll need:
- Potato grow bags – Dedicated potato bags are ideal. They’re typically made from woven fabric or heavy-duty polypropylene and hold around 30 to 40 litres. Look for bags with handles and a flap at the base for easy harvesting.
- Seed potatoes – Always use certified seed potatoes rather than leftover potatoes from the kitchen. They’re disease-free and give you a much better chance of a healthy crop.
- Compost – A good-quality multipurpose compost works well. You can mix in some well-rotted manure or a specialist potato fertiliser for extra nutrients.
- A sunny spot – Potatoes need at least six hours of sunlight a day, so choose your position wisely.
- Watering can or hose – Consistent moisture is key throughout the growing season.
Choosing the Right Variety
Not all potato varieties suit container growing equally well. In general, early and second early varieties work best in bags because they mature quickly and don’t need as much space as maincrops. Here are a few reliable options:
- Rocket – One of the fastest-maturing earlies, ready in as little as ten weeks. Perfect if you’re impatient for results.
- Charlotte – A popular salad potato with a lovely waxy texture and a nutty flavour. Reliable and easy to grow.
- Swift – Another early variety that does brilliantly in containers and produces a decent yield.
- Maris Piper – If you prefer a floury potato for mashing or roasting, Maris Piper is a classic choice, though it benefits from a larger bag.
For guidance on choosing seeds and growing supplies, it’s always worth checking a trusted home gardening resource to compare your options before you buy.
Chitting Your Potatoes
Chitting simply means letting your seed potatoes sprout before you plant them. It gives them a head start and can improve your overall yield. Here’s how to do it:
- Place your seed potatoes in an egg box or shallow tray with the eyes (small indentations where shoots will grow) facing upwards.
- Leave them in a cool, light, frost-free spot — a windowsill or unheated spare room works well.
- After two to four weeks, you should see short, stubby shoots of about 1 to 2 cm. These are your chits.
- You’re now ready to plant.
Chitting is most useful for early varieties and is best done from late January through to March, depending on when you plan to plant.
How to Plant Potatoes in Bags: Step by Step
Once your potatoes have chitted and you’re past the risk of hard frosts (usually from mid-March to April in most parts of the UK), you’re ready to plant. Follow these steps:
- Step 1: Roll the sides of the bag down to roughly a third of its full height. This makes it easier to manage early on and allows you to build up the compost as the plant grows.
- Step 2: Add around 10 to 15 cm of compost to the bottom of the bag.
- Step 3: Place two or three chitted seed potatoes on top of the compost, spacing them evenly and ensuring the shoots face upwards.
- Step 4: Cover with another 10 cm of compost and water gently but thoroughly.
- Step 5: Place the bag in your chosen sunny spot and keep an eye on moisture levels.
Earthing Up as the Plant Grows
As your potato plants grow and their stems reach around 15 to 20 cm above the compost surface, it’s time to earth up. This simply means adding more compost to cover most of the stem, leaving just the top few leaves exposed. Roll the sides of the bag upwards as you go.
Earthing up does two important things: it encourages more potatoes to form along the buried stem, and it prevents any developing tubers from being exposed to light (which turns them green and makes them mildly toxic). Continue earthing up every two to three weeks until the bag is full.
Watering and Feeding
Potatoes in bags dry out more quickly than those grown in open ground, so regular watering is essential. Check the compost every day during warm weather — it should feel damp but never waterlogged. Overwatering can cause the tubers to rot, so make sure your bags have adequate drainage.
Once the plants begin to flower, this is a sign that tubers are forming. At this point, switch to a high-potassium liquid feed (such as a tomato feed) every week or two to support tuber development.
Common Problems to Watch For
Even in bags, potatoes can face a few challenges. Here are the main ones to keep an eye on:
- Blight – A fungal disease that causes brown patches on leaves and can destroy the crop quickly. Remove affected foliage immediately and consider a blight-resistant variety if it’s a recurring problem.
- Slugs – These can damage tubers underground. Try copper tape around the base of your bags or use organic slug pellets.
- Drought stress – Wilting, yellowing leaves and poor yields are often a sign the plants aren’t getting enough water. Consistent watering is the best prevention.
- Aphids – Check the undersides of leaves regularly and deal with infestations early using an appropriate spray or by encouraging natural predators like ladybirds.
When and How to Harvest
Early varieties are generally ready to harvest around ten to twelve weeks after planting. A good sign that they’re ready is when the plants begin to flower. You can carefully feel around in the compost to check the size of the tubers without fully harvesting — if they’re the size of a golf ball or larger, you’re good to go.
For a full harvest, simply tip the bag over onto a tarpaulin or into a wheelbarrow and sort through the compost by hand. It’s enormously satisfying, and the whole process is much cleaner and easier than digging a bed. Freshly harvested potatoes don’t need to be washed immediately — just brush off loose soil and store them in a cool, dark, dry place.
Final Tips for Success
Growing potatoes in bags is genuinely hard to get wrong once you understand the basics. A few final pointers to set you up for a brilliant harvest:
- Don’t overcrowd your bags — two to three seed potatoes per bag is plenty.
- Keep bags off cold concrete in early spring to protect against late frosts. A few sheets of newspaper underneath can help.
- Rotate your compost after harvest rather than reusing it for potatoes — it can carry disease.
- Label your bags so you remember which variety is which, especially if you’re trialling several at once.
For more practical tips on growing your own food and making the most of whatever outdoor space you have, explore the full range of gardening guides and advice at Forest Ferns — there’s plenty to inspire your next project, whatever the season.