
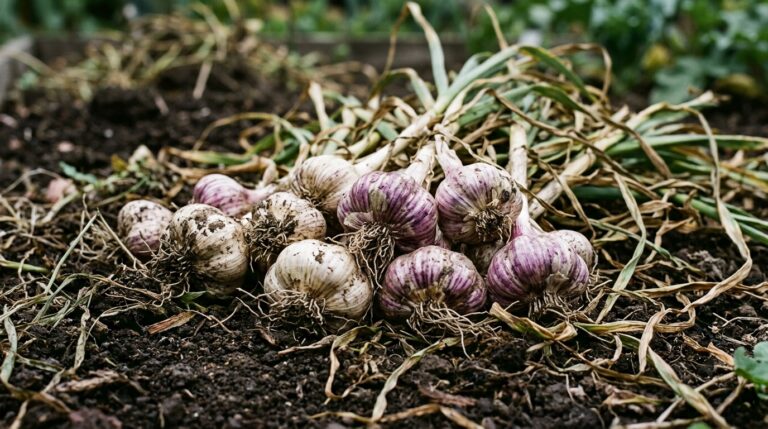
Why Grow Your Own Garlic?
Garlic is one of those wonderfully rewarding crops that asks very little of you yet delivers enormously in return. A single clove planted in autumn can yield a plump, flavourful bulb the following summer, and once you’ve tasted home-grown garlic, the supermarket variety rarely measures up. It takes up very little space, suits both beds and large containers, and is largely trouble-free compared with many other vegetables. Whether you have a sprawling kitchen garden or a modest raised bed, garlic is well worth fitting into your growing plan.
If you’re already exploring ways to grow more of your own food at home, this gardening resource has plenty of practical advice to help you get started and keep things thriving through every season.
Choosing the Right Garlic Variety
Before you plant a single clove, it helps to understand the two main types of garlic available to home growers in the UK.
- Softneck garlic – The type most commonly found in shops. It stores extremely well (often up to a year), produces numerous cloves per bulb, and suits milder British winters. Good varieties include ‘Picardy Wight’ and ‘Solent Wight’.
- Hardneck garlic – Offers a more complex, pungent flavour and is better suited to colder conditions. It produces a central flowering stalk called a scape, which is also edible. Popular varieties include ‘Chesnok Red’ and ‘Lautrec Wight’.
Always buy garlic bulbs from a reputable garden centre or seed supplier rather than using supermarket garlic, which may carry disease and is often treated to prevent sprouting.
When to Plant Garlic
In the UK, the best time to plant garlic is between October and November. Garlic needs a cold period – known as vernalisation – to develop properly, and planting in autumn gives the cloves time to establish roots before the ground freezes. This cold exposure triggers the bulb to split into individual cloves as it grows.
If you miss the autumn window, some varieties can be planted in late winter (February to March), though the bulbs tend to be smaller. For best results, aim to get your cloves in the ground before the first hard frosts arrive.
Preparing the Soil
Garlic prefers a sunny, open spot with well-drained soil. Waterlogged ground is one of the most common causes of failure, as the cloves will rot before they have a chance to establish. If your soil is heavy clay, consider improving drainage by digging in plenty of grit and organic matter, or growing garlic in raised beds.
Before planting, fork over the soil and remove any weeds or large stones. Work in some well-rotted compost or a balanced general-purpose fertiliser to give the cloves a nutritious start. Aim for a slightly alkaline to neutral pH – around 6.5 to 7 is ideal. If your soil is quite acidic, a light dressing of garden lime a few weeks before planting can help.
How to Plant Garlic Cloves
Planting garlic is reassuringly straightforward. Here’s how to do it properly:
- Break the bulb into individual cloves just before planting, keeping the papery skin on each clove intact.
- Choose the largest, healthiest-looking cloves for planting – these will produce the biggest bulbs. Use smaller ones in the kitchen.
- Using a dibber or your finger, make holes approximately 5cm deep and spaced 15cm apart, with rows set around 30cm apart.
- Place each clove into its hole with the pointed end facing upwards and the flat base at the bottom.
- Cover with soil and firm down gently. Water in if the ground is dry.
If you’re growing garlic in containers, choose a pot at least 20cm deep and ensure it has good drainage holes. Use a quality peat-free multipurpose compost mixed with a little horticultural grit.
Caring for Garlic as It Grows
Once planted, garlic is fairly self-sufficient, but a little attention throughout the growing season will reward you with healthier, bigger bulbs.
Watering
Garlic needs consistent moisture, especially during spring when the bulbs are swelling. Water regularly during dry spells, but avoid overwatering. As you approach harvest time in early summer, ease off watering to allow the outer skin to dry and the bulbs to firm up.
Weeding
Garlic doesn’t compete well with weeds, so keep the area around your plants clear. Hand weeding is best to avoid disturbing the shallow roots. Applying a light mulch of straw or well-rotted compost around the plants can help retain moisture and suppress weeds without affecting the bulbs.
Feeding
A high-nitrogen liquid feed in early spring can help promote leafy growth, but switch to a potassium-rich feed (such as tomato fertiliser) from April onwards to encourage the bulbs to develop. Avoid over-feeding with nitrogen later in the season, as this pushes green growth at the expense of the bulb itself.
Removing Scapes
If you’re growing hardneck varieties, you’ll notice a curling flower stalk – the scape – appearing in late spring or early summer. Snap or cut this off as soon as you spot it. Left in place, the plant puts energy into producing flowers rather than fattening the bulb. The scapes themselves are delicious stir-fried or made into pesto, so don’t waste them.
Recognising and Dealing with Common Problems
Garlic is relatively robust, but a few issues are worth watching out for:
- Rust – Orange or yellow spots on the leaves. Improve air circulation and avoid wetting foliage. Mildly affected plants will still produce usable bulbs.
- White rot – A fungal disease causing wilting and fluffy white mould at the base. Remove affected plants immediately and avoid growing alliums in the same spot for several years.
- Leek moth – The larvae tunnel into leaves and bulbs. Use fine mesh netting as a preventative barrier from spring.
- Birds and squirrels – These can dig up freshly planted cloves. Cover with mesh or fleece immediately after planting if this is a problem in your garden.
Harvesting and Storing Your Garlic
Garlic is ready to harvest when the lower leaves begin to turn yellow and papery – typically between June and August depending on when you planted and the variety you chose. Don’t wait until all the leaves have died back completely, as the bulbs can begin to split if left too long.
Ease the bulbs out of the ground gently with a fork rather than pulling, which can bruise them. Shake off excess soil and leave the bulbs to dry in a warm, airy spot out of direct rain for two to three weeks. Once the outer skins are dry and papery, your garlic is ready to store.
Softneck varieties can be plaited into traditional ropes for hanging storage, while hardneck types are best stored loosely in nets or slatted trays. Kept in a cool, dark, well-ventilated place, good home-grown garlic will last several months.
Final Thoughts
Growing garlic at home is one of the simplest and most satisfying steps you can take towards a productive kitchen garden. With minimal effort and a little patience, you’ll have beautiful, flavourful bulbs to enjoy and even save some cloves back for planting the following year. For more ideas on filling your garden with productive plants and practical growing projects, take a look at what Forest Ferns has to offer – there’s something for every level of gardener.